
Introduction
APIs (Application Programming Interfaces) enable seamless communication between various applications and services. API keys ensure secure access to these interfaces. If you’ve ever worked with online services such as payment systems, data collection tools, or even AI models, you’ve likely encountered the concept of API keys. In this article, we will explain how API keys work, how to use them, and how to protect them from security risks.
What is an API Key?
An API key is a unique identifier issued by a service to its users. This key ensures that only authorized users can access a specific API. API keys are commonly used for the following purposes:
- Providing access to API features.
- Identifying users.
- Managing access permissions.
How to Obtain an API Key?
- Registration: First, you need to register on the website of the service you want to use (e.g., OpenAI, Binance, Alpha Vantage).
- Request Access: Once registered, the service will offer the option to generate an API key. This may be free or paid, depending on the level of access you require.
- Key Generation: The system creates a unique key, which can be accessed within your user account.
How the TimeBox Program Helps and Why It’s Worth Integrating an API Key
What is the TimeBox Program?
The TimeBox program is a productivity and goal-planning tool designed to help you manage your tasks efficiently across various time intervals, such as daily, weekly, monthly, and yearly views. It offers a clean, user-friendly interface with features like task management, priority organization, and an intuitive design that ensures users can focus on their goals without unnecessary distractions.
How the TimeBox Program Helps:
- Task Organization:
TimeBox lets you structure your tasks by time intervals, making it easy to manage both short-term and long-term goals. - Priority Setting:
You can assign priorities to tasks, ensuring that the most critical items are addressed first. - Customizable Task Management:
The program supports features like subtasks, color coding, and easy editing, allowing you to tailor your planning experience. - Local Data Storage:
TimeBox stores your task data locally, ensuring your information is secure and accessible even without internet access. - Search and Filters:
Find specific tasks or filter them by status, priority, or keywords to stay on top of your responsibilities.
Why Add an API Key?
Integrating an API key into the TimeBox program can enhance its capabilities in several ways, depending on the type of API used:
- Smart Task Suggestions:
With an API like OpenAI, the program could generate ideas for tasks or subtasks based on your input, saving time and offering creative solutions. - Real-Time Data Integration:
APIs for calendars, financial data, or even weather information (e.g., Alpha Vantage or OpenWeather) can enhance the relevance of your planning. For example:- Sync tasks with external calendars.
- Use market data to track trading-related tasks.
- Incorporate weather updates for outdoor plans.
- Advanced Analytics:
APIs could enable detailed insights into your productivity, such as task completion rates, time tracking, or trends in your planning habits. - Improved Automation:
By connecting to external systems, you can automate repetitive tasks like updating task statuses or importing events.
In Summary:
While the TimeBox program is already a powerful tool for managing and organizing your tasks, integrating an API key unlocks features like real-time data updates, automation, and advanced task suggestions. This makes it an even more versatile and efficient tool for staying productive and achieving your goals.
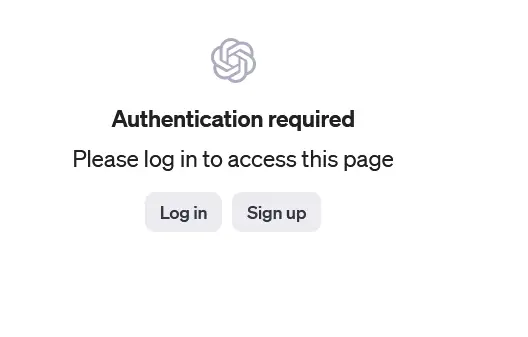
- Register/Login: Create an account or log in to OpenAI here.
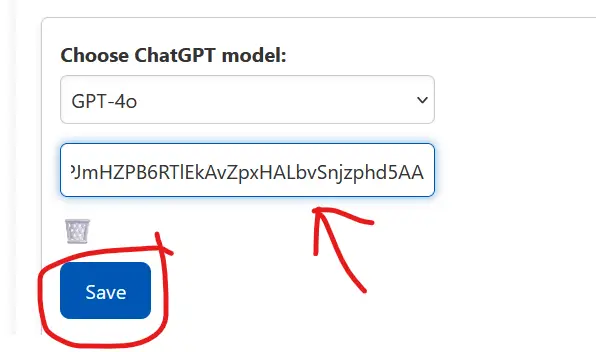
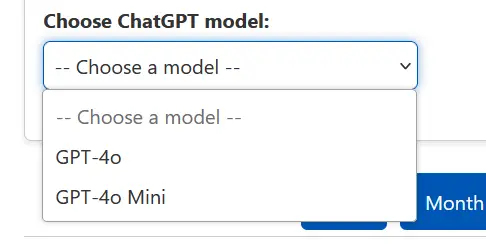
- API Keys Section:
Navigate to the API Keys page in your account settings.- Generate a new API key and securely save it.
- OpenAI offers a pay-as-you-go model, and adding a balance of €10–€20 is usually sufficient for experimenting.
1. OpenAI
How to Obtain an API Key and Why It’s Worth Adding a Small Balance
- Register an Account
Visit the official website of the API provider (e.g., OpenAI, Binance, Alpha Vantage) and create an account. You’ll need to provide your email address, set a password, and complete email verification. - Log In to Your Account
After successfully registering, log in to your account on the website. - Generate an API Key
- Navigate to the “API Keys” or “Developer Tools” section in your account settings.
- Create a new API key by selecting the appropriate option.
- Save your API key securely, as it’s usually displayed only once!
- Add Funds to Your Account
To start using most API services, you’ll need to load a small amount of money into your account. For example:- Recommended Amount: €10–€20 is usually enough and can last for a long time if your usage is moderate.
- This amount is sufficient for getting started and testing the API in your applications.
- How to Add Funds?
- Go to the “Billing” or “Top Up” section in your account.
- Choose your payment method (credit card, PayPal, etc.) and enter the amount you want to add.
- Confirm the transaction.
- Use the API in Your Program
Once you’ve obtained your API key and your account balance is active, you can start using the key in your application as per the provider’s documentation.
How to Check Your API Usage and Add Funds
If you’re using OpenAI’s API, you can monitor your usage and purchase additional credits if needed. Here’s how:
Check Your API Usage
You can monitor how much of your balance has been spent by visiting the following link:
Steps to Check Your Usage:
- Log in to Your Account: Go to the OpenAI website and log in using your credentials.
- Access the Usage Dashboard: Click on the link above or navigate to the “Settings” section, then select “Usage” under your organization settings.
- Monitor Your Spending:
- View detailed information about your API usage, including total spent, remaining balance, and a breakdown of usage by date and endpoint.
- This helps you track your spending and optimize your usage.
How to Add Funds
If your balance is running low, you can easily purchase additional credits:
Steps to Add Funds:
- Log in to Your Account: Use the same credentials you used for setting up your API key.
- Go to Billing Settings: Click the link above or navigate to “Billing” in your account settings.
- Select Payment Method:
- Add a credit or debit card.
- Choose the amount you want to add to your balance (e.g., €10–€20 is usually sufficient for moderate usage).
- Complete the Transaction: Confirm the payment, and the funds will be added to your account immediately.
Why Add Funds?
- Seamless API Usage: Avoid interruptions by maintaining a positive balance.
- Cost-Effective: Even a small amount like €10–€20 can last for weeks or months, depending on your usage.
- Full Access to Features: Unlock advanced API functionalities that may not be available with a free tier.
By regularly checking your Usage Dashboard and keeping your balance topped up via Billing Settings, you can ensure uninterrupted access to OpenAI’s powerful API services.
By integrating an API key into your AI-powered planner, like the Routine and Goal Planner, you unlock advanced functionalities that significantly improve its ability to assist you.